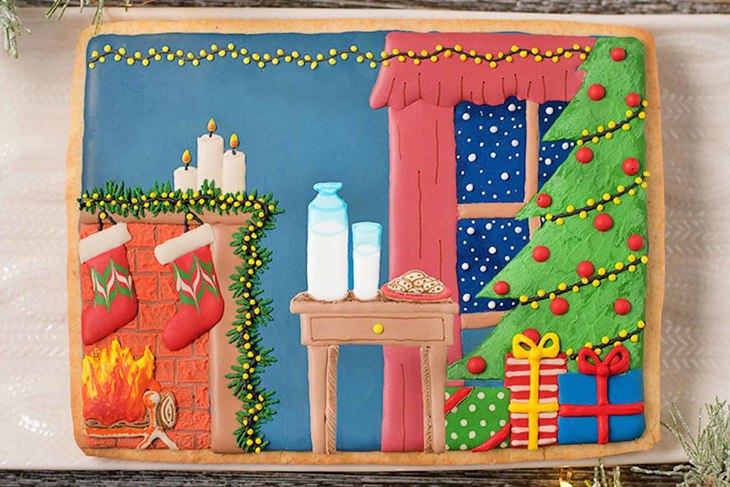
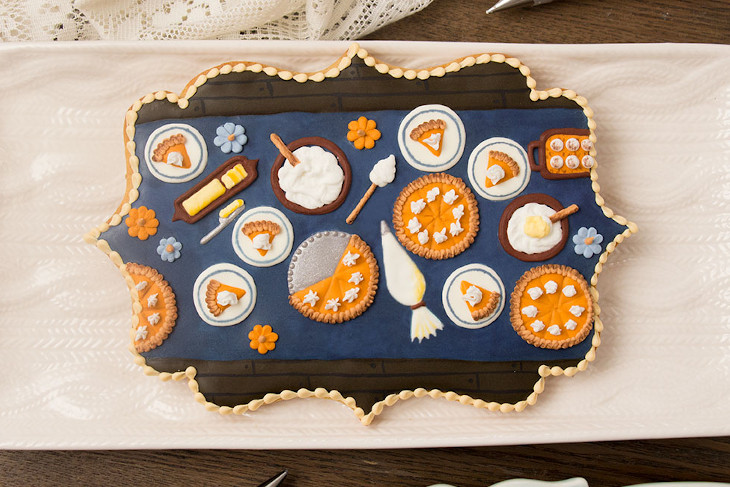
Christmas Scene Cookie
This holiday cookie from SweetAmbs is the perfect upgrade from a traditional cutout cookie! These would be a great addition to any Christmas dessert table. Amber breaks down the steps to make these cookies in the instructions below, and all the supplies you’ll need are listed right here.
30 min Prep Time
0 min Cook Time
- Prep Time: 30 min
- Cook Time: 0 min
Ingredients
- Knife to cut the cookie
- Ruler
- Sugar cookie dough
- 15-second count royal icing in dusty blue, gray, navy blue, red-orange, green, light blue, white, ivory, red, burgundy, yellow, orange, black *
- Soft peak royal icing in brown
- Stiff peak royal icing in green
- 12” decorating bags
- Couplers
- Decorating tip numbers 1, 2, and 3
- Scriber needle or toothpick
- Wide flat decorator brush
- Round decorator brush
- Edible ink markers in brown, orange, and light blue
Instructions
Step 1
Cut a 5.5” x 7.5” cookie from a sheet of chilled cookie dough. Bake according to the instructions and cool completely before decorating.Step 2
Use an edible ink marker and a ruler to draw where the fire place and window will be.Step 3
Fill in the space between the fireplace and window with dusty blue 15-second count royal icing and a decorating tip 3. Use a scribe tool or toothpick to help evenly distribute the icing.Step 4
Fill in the fireplace with gray 15-second count royal icing (no decorating tip necessary).Step 5
Fill in the window with navy blue 15-second count royal icing (no decorating tip necessary). Allow the icing to dry at least 8 hours.Step 6
Use a wide flat brush to apply red-orange 15-second count royal icing to the fireplace. Use the round brush to add texture by stippling. Use the end of the round brush to draw a brick pattern in the icing. Allow the icing to dry about 15 minutes.Step 7
Pipe the mantel and window frame with brown soft peak royal icing and a decorating tip 2. Use the scribe tool to help shape the icing.Step 8
Fill in the curtain with burgundy 15-second count royal icing and a decorating tip 2.Step 9
Fill in the tree with green 15-second count royal icing and a decorating tip 3. Use the scribe tool to help shape the icing.Step 10
Pipe the table legs and yule log with the brown icing. Finish the end of the log with ivory 15-second count royal icing and a decorating tip 1.Step 11
Pipe the stockings with red 15-second count royal icing and a decorating tip 1. Use the scribe tool to help shape the icing. While the icing is still wet, pipe stripes of green and ivory icing and drag the scribe tool up and down through the lines.Step 12
Pipe the tops of the candles with the ivory icing and allow them to dry for a few minutes. Pipe the top of the the table with brown icing and fill in the pillars of the candles.Step 13
Pipe the yule log base with the ivory icing and fill in the last bit of the table with the brown icing.Step 14
Pipe the platter on the table with the red icing and the cuff of the stockings with the ivory icing.Step 15
Use the yellow icing to pipe a knob on the table and nails on the mantel. Pipe strings to hold up the stockings and candle wicks with black 15-second count royal icing and a decorating tip 1.Step 16
Fill in the milk bottle and glass with white 15-second count royal icing and a decorating tip 1.Step 17
Fill in the cookie platter with the ivory icing.Step 18
Pipe a fire in the fireplace with orange, red, and yellow 15-second count royal icing. Use the scribe tool to marble the colors.Step 19
Fill the top of the milk bottle and glass with light blue 15-second count royal icing and a decorating tip 1.Step 20
Pipe flames on the candles with the yellow and orange icing.Step 21
Pipe presents under the tree with green, red, dusty blue, and ivory 15-second count royal icing. Allow the icing to dry for about 1 hour.Step 22
Pipe snowflakes in the window with white 15-second count royal icing and a decorating tip 1.Step 23
Use the black icing to pipe a wavy wire across the top where the lights will go.Step 24
Pipe a garland on the mantel with green stiff peak royal icing and a decorating tip 1.Step 25
Pipe a black wire along the center of the garland.Step 26
Apply a little green 15-second count royal icing to the tree. Use the round brush to add texture to the tree.Step 27
Add black wires to the tree and use the red icing to pipe bulbs.Step 28
Pipe lights along the wires with the yellow icing.Step 29
Use the yellow and red icing to pipe ribbons and bows on the presents. Use the scribe tool to help shape the icing.Step 30
Use the edible ink markers to draw details and add shading.
*Test the consistency by taking a spoonful of icing out of the bowl and dropping it back in. It should take about 15 seconds for the icing to be completely smooth
Note: When piping sections of icing that are next to each other, each section has to dry for a few minutes before piping the next. This is why the tutorial jumps back and forth between different parts on the cookie.
Note: When piping sections of icing that are next to each other, each section has to dry for a few minutes before piping the next. This is why the tutorial jumps back and forth between different parts on the cookie.
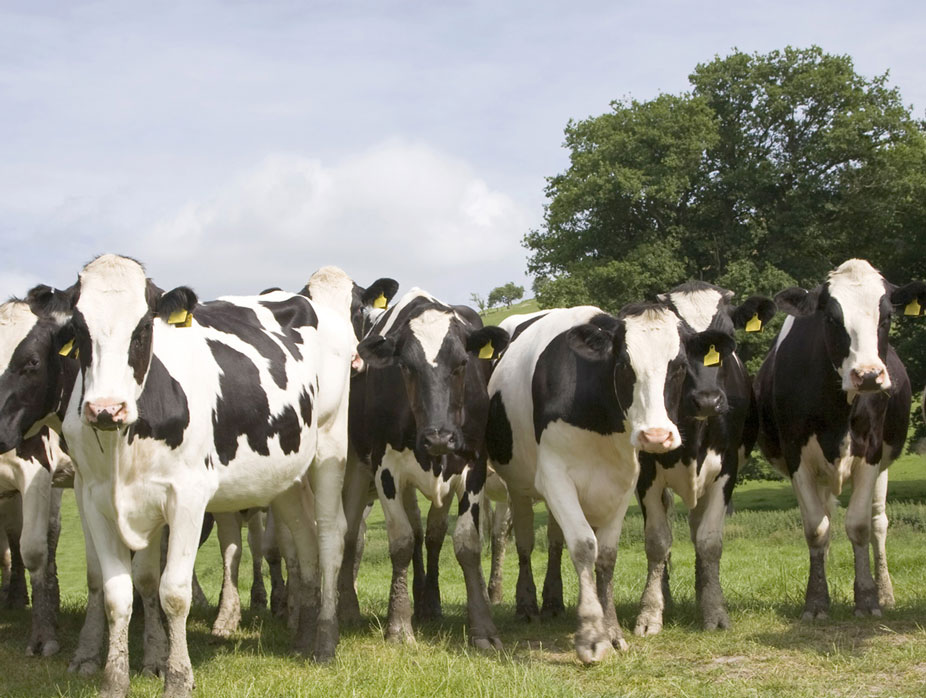
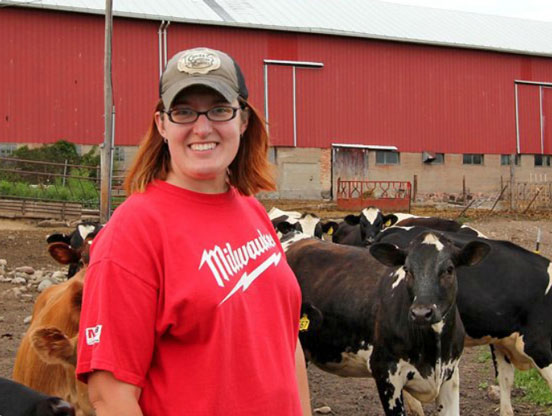
A Dairy Farmer’s Devotion to Feeding Others
Learn how a new farmer, just a decade into her career, approaches her day-to-day and commits herself to helping end hunger.Reviews & Tips
There are no reviews yet for this recipe. Be the first to write a review.
Write a Review