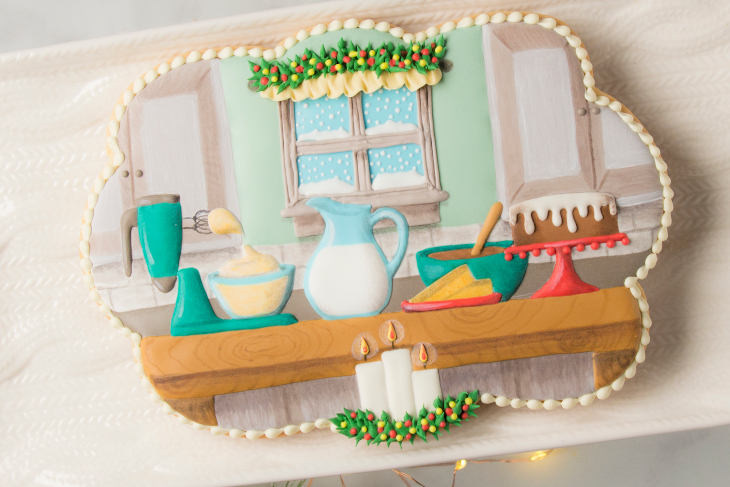
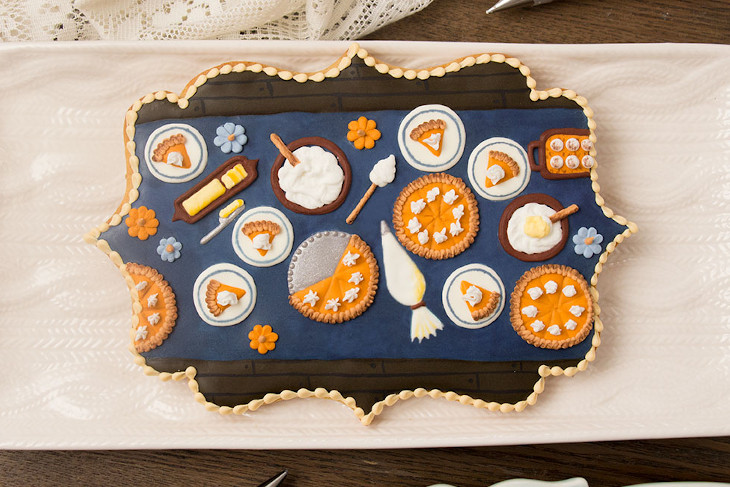
Holiday Baking Scene Cookie
Looking to get creative this holiday season? SweetAmbs shows us a cute, crafty cookie!
1 hr Prep Time
10 min Cook Time
- Prep Time: 1 hr
- Cook Time: 10 min
Ingredients
- 1 batch sugar cookies
- 1 batch royal icing
- Plaque cookie template
- Edible ink marker (optional)
- Food coloring
- 15-second count royal icing in light gray, light green, dark gray, golden brown, ivory, white, light blue, brown, teal, yellow and red. (Test the consistency by taking a spoonful of icing out of the bowl and dropping it back in. It should take about 15 seconds for the icing to be completely smooth)
- Soft peak royal icing in light gray, yellow, and red
- Stiff peak royal icing in ivory, white, and green
- 12” decorating bags
- Decorating tip numbers 1, 2, 3, and 101
- Scriber needle or toothpick
- Edible dust for painting in black, brown, and white
- Vodka or any flavor extract to mix with food coloring to use as paint
- Decorator brushes
Instructions
Step 1
From a chilled sheet of cookie dough using the plaque cookie template as a guide, cut around the plaque with the paring knife. Bake and cool the cookies according to the recipe instructions.Step 2
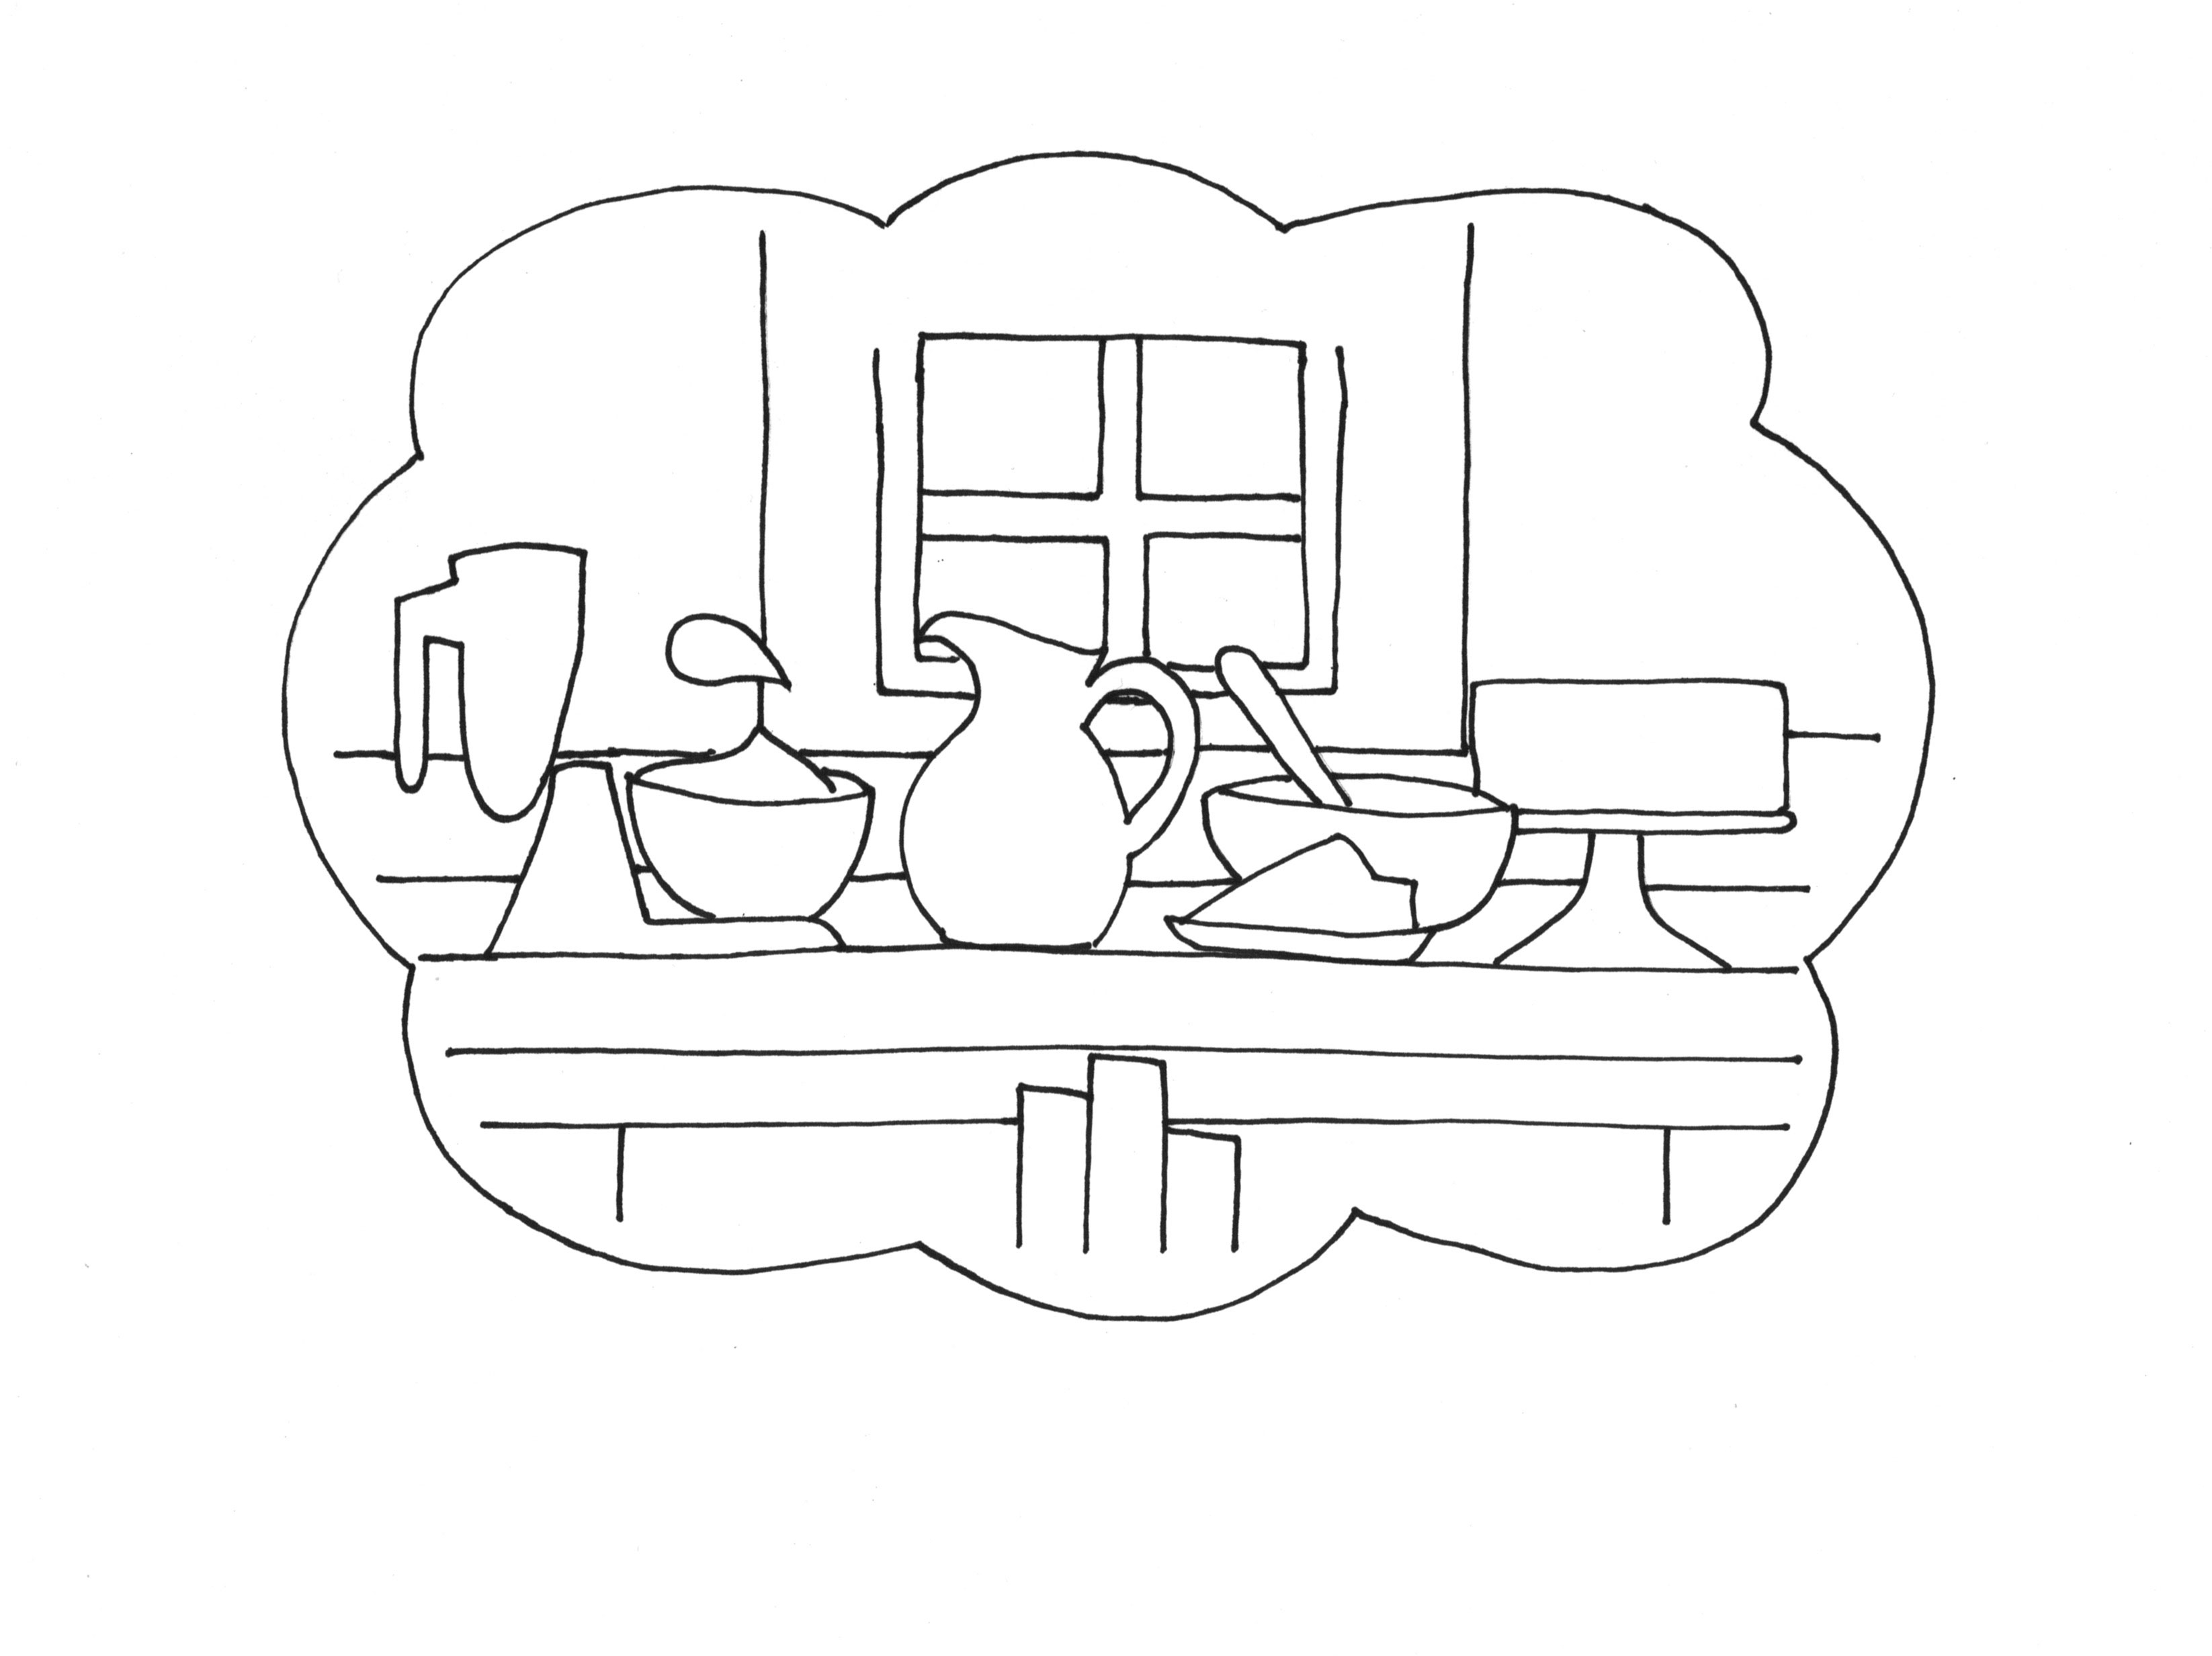
Cut the template into pieces and creating a guide by tracing each piece onto the cookie with an edible ink marker or a scribe tool or toothpick.Step 3
Ice the upper cabinets with light gray 15-second count icing and a decorating tip 2. Use the scribe tool or toothpick to evenly distribute the icing.Step 4
Ice the window with light blue 15-second count icing and a decorating tip 2.Step 5
Ice the wall around the window with light green 15-second count icing and a tip 2. Use the scribe tool or toothpick to evenly distribute the icing.Step 6
Ice the tile backsplash in white 15-second count icing and a tip 2. Use the scribe tool or toothpick to evenly distribute the icing.Use the scribe tool or toothpick to evenly distribute the icing.Step 7
Ice the countertop with dark gray 15-second count icing and a tip 2.Step 8
Ice the lower cabinets with light gray 15-second count icing and a decorating tip 2. Use the scribe tool or toothpick to evenly distribute the icing. Allow the icing to dry completely (at least 8 hours or overnight)Step 9
Use the scribe tool to trace the rest of the template pieces in the surface of the icing.Step 10
Ice the window sill and mullion with light gray soft peak icing and a decorating tip 1. Use the scribe tool or toothpick to help shape the icing.Step 11
Paint the cabinets with a mixture of edible white dust and vodka or any flavor extract.Step 12
Combine edible black and brown dust and mix it with vodka or any flavor extract for shading.Step 13
Use the black and brown dust mixture to paint the details on the tile backsplash.Step 14
Pipe the butcher block table legs with golden brown 15-second count icing and a tip 1.Step 15
Use ivory 15-second count icing to fill the mixing bowl of the stand mixer and outline it with light blue 15-second count icing and a tip 1.Step 16
Add snow to the window with the white icing.Step 17
Use brown 15-second count icing to fill the other mixing bowl and the cake with a tip 1.Step 18
Pipe the stand mixer with teal 15-second count icing and a tip 1. Pipe the details on the mixer with the dark gray icing. Use the scribe tool to help shape the icing.Step 19
Fill in the butcher block table with the golden brown icing.Step 20
Pipe the other mixing bowl and the bottom of the stand mixer with the teal icing.Step 21
Outline the pitcher with the light blue icing and fill it with the white icing.Step 22
Pipe the candles with the ivory icing, allowing the first one to dry a bit before adding the other two.Step 23
Use the ivory icing to pipe the butter.Step 24
Pipe the cake stand with 15-second count red icing and a decorating tip 1.Step 25
Pipe frosting on the cake with the ivory icing.Step 26
Paint the beaters on the stand mixer with the edible black dust. Pipe a dollop of cream on the beaters with the ivory icing.Step 27
Fill in the butter plate with the red icing.Step 28
Pipe a spoon handle in the mixing bowl with the golden brown icing.Step 29
Shade the butcher block and add wood grain with the edible brown dust.Step 30
Add more shading with the edible black dust.Step 31
Add highlights with the edible white dust.Step 32
Paint the butter and batter in the stand mixer with a mixture of yellow and brown food coloring.Step 33
Pipe flames with the red and ivory icing. Use the scribe tool or toothpick to help shape the icing.Step 34
Pipe a valance with ivory stiff consistency icing and a decorating tip 101.Step 35
Pipe greenery around the candles and the valance with green stiff consistency icing and a decorating tip 2.Step 36
Pipe lights in the greenery with soft peak yellow and red icing.Step 37
Add a glow around the candles with edible white dust and yellow food coloring.Step 38
Pipe a bead border with white stiff consistency icing and a decorating tip 3.
.jpg?ext=.jpg)
.jpg?ext=.jpg)
Austin Allred on Family Values and Sustainability
Learn how a young farmer incorporates family life and sustainable innovations into dairy farming.Reviews & Tips
There are no reviews yet for this recipe. Be the first to write a review.
Write a Review